Pack & Stack

IMG_2661

Pack & Stack is super fun game for students of all ages. It has a lot of components, and I recommend having an older or experienced student assigned to decide challenges and monitor play during the game for large groups. Students are pretending to be truck drivers moving different loads (wooden cubes/rods) without having anything left behind or having empty truck space.

Components: 30 truck cards, 64 point markers, 5 dice (all different colors and number combinations); 96 wooden pieces (30x 1 cube pieces; 24x 2 cube pieces; 18x 3 cube pieces; 12x 4 cube pieces; 12x 5 cube pieces) in 5 colors divided by size.

Setup:

1) Shuffle the truck cards and place them face down in a stack.

2) Give each player 75 points worth of markers- if using money/points.

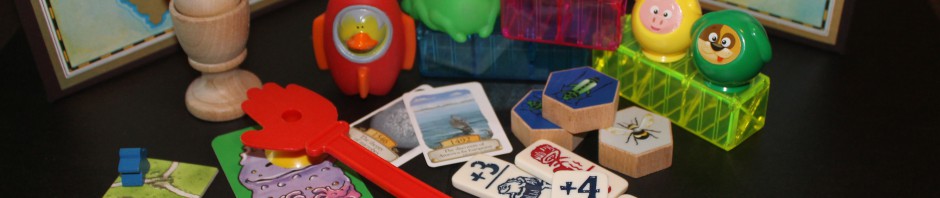
3) Each player takes a turn rolling the 5 dice. For each dot on the top, the player receives a matching wooden cube/rod from the bag. For example:

IMG_2662

This player takes one piece for each dot; since there are no dots on dark blue, they don’t receive any 5-cube dark blue pieces in this round.

4) Once each student has rolled their truck load and considered the size truck needed, each student takes 2 trucks (3 or 4 players) or 1 truck (5 or 6 players) and puts them face down in front of them, but where everyone else can reach them. Then all the players flip the trucks cards at once, and take a truck from in front of a different player. This is where things can fall apart in the classroom…I have used name-sticks to take turns picking a truck from a choice of 7 trucks or just let every student pick 2 trucks from the pile to start with. Once they touch a new truck, they cannot pick another. It is also possible to let student choose the top card of the draw pile (no peeking) instead.

IMG_2664

5) Each student now tries to fit all of their wooden pieces onto their selected truck without having any empty spaces or left overs. The pieces MUST fit in the open footprint on the card, and can only be as-many-cubes-high as the number on the truck. For example:

IMG_2669

Since I can only go 2 cubes high, and the plus-sign shaped footprint is 3 cubes across at most, these 5 pieces fill the truck completely. But I have 2 teal and 1 grey piece left over.

6) For every empty space (1 cube size)  the truck owner must pay 1 point/dollar to the bank. Each left over wooden piece that did not fit into your truck is 2 points/dollars per 1 cube size to paid to the bank. In this case, I have 2 teal pieces each the size of 4 cubes (4x2x2) and a 2-cube sized grey piece (2×2) so I owe 20 total. Students can use a white cube to measure their spaces and pieces if needed.

7) The “winner” is the  person with the most money after a set number of rounds; or the last person left with money. The truck draw pile can be shuffled after each round, or as needed.

Alternative versions/uses:

This game is moderately complex, and has a lot of room for modifications and other uses. Ages 5 and up will play this game, even high school and adult buddies love it. Be creative! And if you make a DIY version, let me know. Buying a copy seems infinitely easier 🙂

1) Students play in partners, max of four teams (8 students). The first student rolls for the load and selects the truck, the second player fills the truck. The roles switch in each round. You can allow the partners to talk through solutions to introduce cooperation, or make it a silent game to test spatial awareness.

2) Use this in a small group to talk about volume, spatial awareness, adding/subtracting/multiplying in a real world context. In a small group, I have each student roll to make their load, then have them experiment with putting the pieces together in different ways. Then I show them 5-7 preselected trucks (different heights, similar or dissimilar shapes depending on what I want to talk about) and ask which is the BEST truck for them to use. I let them experiment as we talk through the decision process. With younger students, I may have 2-3 students with all the same truck load (one roll for all) and investigate a set of 6 trucks to see which is best for the load and why.

3) You can also leave out the wooden pieces and truck cards as a center to let them experiment with loading the trucks.

4) If you leave out the pieces and truck cards as a center, younger students can practice measuring with the cubes or cube-measuring sticks or tapes that you provide in appropriate sizes.

5) If you are working with money, you can switch the point markers for play money and make the business theme more prominent.

6) A timer can help change the dynamic of this game, both in total playing time and in actually packing the truck. Some students may enjoy a “bonus” for packing their truck the quickest, or having the least amount of pieces left over.

7) You are always welcome to throw out the point system completely and make up your own goals- least pieces left over, most filled truck, best explanation, ability to fix someone else’s truck to add more pieces from their left overs….


Posted in Boardgame | Tagged , , , , , , , , , | Leave a comment

Monster Mash

IMG_2658The first TBT post has Halloween flavor as well. Children of the 80’s may remember Monster Mash, a loud but fun visual discrimination game. I was  lucky to find a $2 copy at an indoor charity yardsale outside Albany, NY. The box was toast, but it contained all the components! My preschoolers loved this game; we used it as a filler in small groups often. I would love to find more of the hand components, they are great for DIY selection games.

Components: 4 ‘thwacker’ hands with suction cups, 27 monster cards with every combination of the 3 elements (3x3x3), and 1 push-button rotational yellow monster machine.

Standard Play/Setup

Each player receives a thwacker hand. If you playing pairs or teams, the hand must be rotated between players on a team.

Thwackers arrange themselves around the playing area. The 27 monster cards are scattered face up randomly in the playing area. Make sure all thwackers can reach all of the cards.

Players may rotate turns pushing the button on the yellow monster machine, or the game leader may choose a button pusher from waiting students.

Once the rotational bars stop spinning, the thwackers attempt to locate the card matching the picture on the yellow monster machine, thwacking it with their thwacker. If it matches, they keep the card.

IMG_2659

If the yellow monster machine displays a monster that has already been thwacked, then the next button pusher may reset the display, etc., until a new combination is displayed that can be thwacked.

Play can continue until a team/player has found 3 cards, or until a timer set by the teacher/game master rings. The timer is especially helpful when many students want to play, but shouldn’t be used until students can be trusted with independent play or under a student game master.

Variations

1) As mentioned above, players may play in teams of 2-3 with rotating turns on each new card search for cooperative play. Teams may be allowed to help teammates verbally, or silently according to the game master/teacher.

2) For younger or advanced players, students may be challenged to find all the cards that share 2 of the elements (touching or not) shown on the yellow monster machine as well as the exact match. This speeds up the game immensely.

3) Use the thwacker hands in any small group game or activity that requires picking up or finding a card. Students LOVE the thwackers, and they still attach to glossy cards after 30 years!

DIY

If you figure out how to make a DIY monster machine, please post pictures! Otherwise, you can make your own set of images and matching dice in your choice of theme. This is especially cool when you are studying adaptations or animal/plant characteristics. Student could even make their own sets; though you may have to hunt for fun “thwackers.”


Posted in Boardgame | Tagged , , , , , , , , | Leave a comment

Pinterest Link

I am attempting to create boards on Pinterest that will lead you to specific games and resources for educators- visual lists to help you find materials online.

Check it out!

2xdiceplayroom on Pinterest

Posted in Uncategorized | Leave a comment

Robot Turtles

IMG_2503

I should have reviewed this game sooner-I ordered my first copy during the Kickstarter campaign (left box) and then advanced order the ThinkFun version (right box) to get the expansion when they picked it up. Super simple idea that kids love, it teaches them the basics of programming (without the computer) and there are so many ways to make your own expansions. This post will focus on the ThinkFun version, now available at Target (!) and other retailers for the holiday season for about $25.

IMG_2504

Components: 1 game board, 4 different colored robot turtle tiles with 4 matching jewel tiles; 4 Bug tiles (get it?), 4 decks of 44 cards each matching the turtles/jewels; 36 obstacle tiles (20 stone walls, 12 ice walls, 4 crates).

Setup:

Layout the game board so all players can reach it. Each player/team claims a turtle and places it in the right hand corner of the board on their side. The jewels are placed in the center 4 tile-spaces, with the color matching the turtle to the diagonal lower-right.

IMG_2505

Each player then receives the deck matching their turtle color and Bug also matching the turtle color. The deck should be face up, and in the first game only contain the turn left, turn right, and step forward cards (yellow, purple, blue stripes).

Explanation:

There needs to be an adult or experiences turtle mover to play with students. Older students “volunteering” in the classroom work well after a teacher tutorial. The turtle mover must make silly noises when moving the turtles for the student programmers.

The yellow turn left cards allow the player to turn their turtle left towards the yellow flower on the turtle tile, but NOT take a step.

The purple turn right cards allow the player to turn their turtle right towards the purple flower on the turtle tile, but NOT take a step.

The blue step forward card allows the turtle to move forward one tile-space towards the blue flower on the turtle tile.

Each player may undo a move by tapping their Bug Tile and shouting BUG! This may be used as many times as needed in a turn.

Basic play

Turns proceed around the table in a circle from the starting player.

On their turn, a player picks a card from their deck and places it in front of them. It is added to the “program” of cards lined up in front of them beyond their first turn.

The Turtle Mover (adult, experienced player) then moves the turtle according to the new

card in front of the student. If a student uses the BUG! tile, they may change the card they just placed with the Turtle Mover moving the turtle. Programs should be read right to left. With younger students, it may be helpful to have a small turtle token to place on the current turn’s card so they can self-edit. I have also allowed them to run their program from the start, replacing the t

urtle in the corner tile and watching the entire program if needed.  

IMG_2507

In the above example, the blue turtle has gone forward 1 from the corner, turned left and advanced 2 spaces- when it should have only advanced 1 according to the program shown.

Play ends when every player has successfully run a program to lead their turtle to their jewel.

Included Expansions (Unlockables):

These should be introduced one at a time, but experienced players may choose to make very complicated obstacle paths. The rule book (and www.thinkfun.com/robotturtles includes diagrams for setting up obstacles on the board, but you can place them however you want.

1) Ice Walls: Turtles can’t walk through or push these, but they can use lasers (red-striped cards in the deck) to melt them. You should introduce the lasers AFTER the students can navigate around the ice walls.

2) Stone Walls: Again, can’t be pushed or knocked down- lasers won’t work on these.

3) Crates: Turtles may push the crate, unless there is a stone/ice wall, puddle, or turtle in the way (then it is too heavy). The crates also may NOT be pushed off the edge of the game board.

Write Program Version

When students are ready, you can challenge them to play several or all their cards in one turn to reach the jewel. This is a jump to “real programming”, when students must use strategy and try to get their turtle to the jewel in one go. The Obstacles should not be used the first time in Write Program, and the BUG tile is still available to completely undo the program and reset the board.

Function Frog

One Write Program has been mastered, Function Frog can be used. Function Frog allows a sequence of cards in the program to repeat- it introduces a loop to shorten the program. The main program has direction cards and the Function Frog cards- a separate sequence of cards is maintained which the Frog represents.

The Turtle Mover is the “computer” running the program. If the programmers try to do something illegal, like laser a jewel or crate, or push a turtle, the turtle tile should wiggle and make weird noise so that the Bug Tile needs to be used.

Variations

There are so many included already! But-

1) Players can play in pairs to make it more cooperative. It may work to have one programmer and one mover on each team that switch regularly, but having ONE Turtle Mover as an objective third party seems to work best.

2) I would have LOVED to make a giant version to use in a full class warm up.  A Smartboard or overhead version could work too with different table teams trying write a successful program for a single turtle on the board with obstacles.

3) If the students have left/right concepts down, the turtle tiles and jewel tiles could be replaced with appropriate themed wooden/plastic pieces to change theme. You may have to make your own cards too…

DIY

Yes, you could make your own version using plastic bits and any theme you want. But this is a great product- put it on your classroom wish list, or see if other teachers will pitch in to get a class set that can be passed around. If you have any computer industry parents, they may be willing to secure 5-6 copies for class activities.


Posted in Boardgame | Tagged , , , , , , , , , , , , , | Leave a comment

Duck Duck Goose

IMG_2500I found this gem at the local thrift store for $3- it even came with the 3AAA batteries needed for the Momma Goose! For preschool game connoisseurs, this is a slightly quieter cousin of Lucky Ducks which I do not have a copy of yet.

Components: 1 motorized Momma Goose, one game board, 14 ducklings (1 grey and 13 yellow ducklings- 1 is an extra), 13 half-egg stands for the ducklings, and 4 nests with 3 random color dots.

Setup: My copy was all assembled, but normally 3 AAA batteries need to be placed in the Momma Goose. The ducklings may also need to be punched out of the cardboard sheet and placed in the stands (there is an extra yellow duck- forcing the cardboard into the stands leads to casualties).

Put the board in the center of all players. Randomly place the ducklings on the center ring lily pads. Hand out a nest to each player. Put the Momma Goose on a random “splash” spot on the outer ring- next to the grey duckling is suggested. Make sure she is turned “On.”

IMG_2501

Standard Play:

On your turn, you lift the Goose by it’s head and place it on the next open space, which must be next to a duckling- so skip splashes adjoining empty lily pads

. Push down the Head. The Goose will make a splash sound and flap its wings, then say “Duck” or “Goose”. If it says “Duck” you may move the Goose to the next splash spot next to a duckling, and push the head again. This repeats until it says “Goose!” “Goose” allows you to pick up the duckling adjoining the Goose’s splash spot and look at the colored dot on the bottom of the egg.

IMG_2502

If it matches a dot in your nest you may place it on that dot. Otherwise it is returned to its lily pad and it is the next player’s turn. The grey duckling is “wild” and has all the colors. The winner is the first player to “fill” his or her nest by matching ducklings to the dots.

Variation:

1) Make new nests with numbers (dots or numerals) and place stickers on the bottoms of the eggs with dots or numerals to make a math matching game. This can also be done with the target letters of the week, upper and lower case.

2) To practice sharing: when a duckling is revealed that does not match the player’s nest dots, any other player may ask “May I have that duckling?” if it is needed in their nest. If the giver is able to politely answer “Yes you may” and hand the duckling nicely, they may have the opportunity to select any duckling to turn over and keep- this would also test their memory. The player could also be the asker- “Does anyone need this duckling?” and then they can nicely select someone who politely says “I do, please!”

DIY

Granted, the motorized goose is a HUGE draw for the younger kids. However plastic Easter eggs could be re-purposed for an alphabet upper/lower or dot/numeral set for rotation, and any animals could be printed to fit our themes. I would use a die with pictures or the words ducks and goose on them to run the DIY game.

Super cute if you see a copy- but can be grating if listened to for too long…..


Posted in Boardgame | Tagged , , , , , , , , , , | Leave a comment

Sequence

IMG_2495

Sequence is a moderately easier to find board game at thrift stores. It is also possible to make DIY versions, and accommodates up to 12 students a time. If you can find 3-4 copies, you have a class set! There are travel versions, horrible themed versions, and even a “Kids” version with animal pictures. This is more of a math game for early elementary when identifying sets or counting, but extensions could be applied making older children construct math sentences/equations with their sequences…

Components: 1 game board with  all cards in the deck represented twice except the Jacks; a deck of 104 cards; three bags of markers in three colors- 50 blue, 50 green, and 35 red.

Setup:

This game is for individuals in multiples of 2 or 3. So 2 or 3 students can play individually, or there can be 2 or 3 teams with up to 4 players on each team. Teams should have equal numbers of players.

The Blue and Green markers are used first, the Red markers are for the third student/group. 

Players sit around the board, and teams rotate taking turns WITHOUT SPEAKING. So one player from each group has a turn in each round, and in the next round a different player from each team goes. The student sit by team alternating around the board (blue player-green player-red player-blue player- etc.) to help them keep track of turns.

Discard jokers from deck, decide on team/pla

yer order. Put markers in containers that can be reached by all players. Shuffle and deal cards to players, the number depends on the number of players (7 for 2 players, 6 for 3/4, 5 for 6 players, 4 for 8/9, and 3 for 10/12 players). Place the pile of draw-cards within reach of all the players and identify a discard are for cards. Below is an example 2 team game, blue is attempting to make 2 sequences crisscrossing each other, while green needs a space that blue also needs.

IMG_2499

Standard Play

Turns rotate around the board. During a turn, a player discards a card from their hand and places a marker for their team on ONE of the matching cards on the board to their discard, as long as it is uncovered. Jacks with 2 eyes are wild and allow you to put a marker for your team on ANY card on the board when discarded. Jacks with 1 eye allow you to REMOVE a marker from the board EXCEPT a marker that is part of a completed “sequence.”

IMG_2498

The player then picks a card from the draw pile for their hand. The four corner cards on the board are “free” markers and can count toward any sequence adjacent to them. A sequence consists of five markers on adjacent cards in a straight line stretching up and down, across, or diagonal.  In a 2 player/group game, 2 sequences are needed to win; in a 3 player/group game only 1.

If a player holds a card that cannot be used because both of the matching spaces on the board are covered, on their turn they may announce this fact and discard the unusable card for a new one from the draw pile.

The discard pile can be reshuffled into a draw pile as needed.

There are rules about not getting to draw a replacement card if you forget to do it on your turn, and not talking to teammates, but it is up to you if you want to enforce them- this was age dependent for me.

Variations

1) For younger students, the board can be modified by taping lower number cards to practice recognizing sets to 5, 8 or 10.  If you do this, it is best to make your own deck as well, putting together incomplete decks to ensure 1:1 ratio of cards to card images on the board. I either emphasized “matching” (visual discrimination) of held cards or counting. If counting was the emphasis, the symbol (heart, club, etc.) didn’t matter. With ages 4-6 I also shortened the sequence to 3/4 markers, or challenged them to make the longest (student identified) continuous Sequence (could use markers twice if path crisscrossed) in a given amount of time. Many jumped to making “the most” 5 marker sequences by the end of Kindergarten.

2) Time crunch? Set a timer and see which team/player can make and identify the most sequences, or the longest sequence path in the given time.

3) Have a 100’s pocket chart and software to print your own cards? You can make a changeable version with vocabulary words, science images, animals, Russian alphabet letters, country flags, healthy food, periodic table elements- the sky is the limit. If you have capable students, they LOVE making the pieces (cutting, selecting game pieces) during free-time for the class to use. You could even have the picture on the board and the words on the cards….

4) Starting to work on adding, subtracting, etc? Challenge older students to make Sequences of numbers and face cards equating +/-/x symbols that can be rearranged to make equations or number sentences or patterns. It works best for adding, but I had one small group of remedial math students who used the cards like in this example: the “1” and “5” cards to make 15 for 3×5 = 15.

5) You can also extend this idea, and allow students to add “1” and “6” cards to claim “7” spots on the board for example; or “2” x “3” to claim 6. I have also allowed them to remove markers this way 🙂

6) It is easy to allow talking and make this a cooperation game, especially if you re purpose the components or make your own themed game. It works best with an extension like making equations, or matching pictures to words, or having them write a story about the words in their sequence.

DIY

I think I covered it above, but you can use pocket charts or reused boards to make your own Sequence boards. Blank decks of cards can be bought, but usually used business card templates in word so I can easily print and cut my own sets. (If you have students make their own sets, the blank-store card sets are good motivators for their final drafts.)

This is also a great way to reuse incomplete decks of playing cards in your classrooms, let families know you want “unusable” decks! (You can also use these decks for “More” and “Less” sets (a way to re-brand the classic “War” card game for math in K, 1, 2…).

I have also made the cards first (like for sight words and symbols) and then photocopied the cards in random patterns, minimizing them in the photocopier. This is a new way to challenge pros who have memorized the included board too.

Old checkers work great for 2 player/group DIY sets, but you can really use any old markers you have laying around.

Please send or post pictures of your DIY sets!


Posted in Boardgame | Tagged , , , , , , , , , , , | Leave a comment

Fits

IMG_2240

FITS may remind you of a certain video-game from your childhood. FITS uses tiles that are shapes made of 3, 4, or 5 squares to test your spatial ability in four levels. It is recommended for ages 8 and up, but the shapes are hefty and fun for younger ages too.

Components: 4 sets of the following in different colors (red, blue, green, yellow): 16 square-shape tiles, 2 game boards,  a ramp, and a cover. Also four starting cards and 16 building cards, each with a picture of one of the tiles. The 2 game boards are double sided, and numbered 1-4 to help you and students work on the same step at the same time! You can also store the pieces in the ramps/under the boards and cover, but I think plastic bags work better.

IMG_2237

Setup:

This can be played by 1-4 players; the rules include point levels or goals for solo players to aim for. Each player selects a color and receives the 16 tiles in their color, the ramp, 2 game boards, and plastic cover. The “1” board is placed on the ramp facing up, then covered with the plastic tray cover. The other board may go beneath or on the table. The tiles are placed next to the ramp. The four starting cards are shuffled face down, and each player is dealt one card. They may place that piece on their board, starting at the top and sliding straight down- no sideways shifting allowed once it starts to slide down. The piece may be in ANY orientation. The deck of 16 building cards is also shuffled and placed face down near the dealer.

IMG_2236

Standard Play

Round 1) Scoring is as follows: each complete horizontal line (covering all dots) is worth 1 point; each uncovered dot is worth -1 point at the end of the round. The goal is to make as many complete lines as possible.

The dealer flips over the first building card. Each player finds the matching tile of their color and determines the best fit, placing the piece at the top of the ramp and sliding it straight down to the bottom. NO sideways movement is allowed once it has started down the ramp. One everyone has slid down their piece, the dealer continues to flip over building cards and the players add that piece to their ramp as before. If a player’s starting piece is the same as a building tile (will occur once each round for each player) the player just waits until the next building card is flipped to participate. A player may decline to use any piece, but declining too many will leave many uncovered dots. When all building cards have been used, scoring occurs. Players record the score for each player in round 1.

Round 2) Players remove the tiles from their boards, and change the facing up board on their ramp to board “2.” In this round, the white dots with numbers are worth that many points if left uncovered at the end of the round. Visible dots (without numbers) are still -1 points. The building and starter cards are shuffled again; each player is dealt a starter card and can place that piece as before, and the dealer turns over the building cards one at a time for players to place pieces as before. Players may decline any and all pieces. When all building cards have been dealt, scoring commences.

**Except for the scoring, play is essentially the same in all Rounds.

Round 3) Using the “3” boards, dots with negative numbers are worth negative points, dots with positive numbers are worth positive points if left uncovered at the end of the round. Regular dots are still worth -1. Players shuffle and are dealt one starter card; the dealer shuffles and deals the building cards one at a time. Players may decline to place any piece, scoring occurs when all building cards are dealt.

Round 4) Using the “4” boards, each pair of matching symbols left uncovered at the end is worth +3 points; if only one of the pair is visible it is worth -3 points. Dots are still worth -1. Play proceeds as in the other rounds. At the end of this round the winner is the player with the highest score of the summed 4 rounds.

Variations

1) On BoardGameGeek, there are print and play variations- go to the main FITS page and poke around the expansions (MOTS, LOTS, etc.) and associated files. There even amateur templates posted to make your own boards- check them out here.

2) If using this with younger students, I would keep to the 1 and 4 boards; maybe board 2 if they are learning to add. Board 3 requires understanding of negative numbers/subtraction.

3) Short on time? Just do one round! Have a student leader pick which of the boards the group will use. One round lasts under 10 minutes.

4) Cooperative play: It is tight, but the students can man a ramp in pairs and take turns placing pieces. This is helpful for social skills, but also math-talking explaining spatial-reasoning and strategy.

5) Make your own boards- or even better- have the kids make ones using set shapes in the grid, negative space, or trying to cover certain areas. THEN analyze which worked best!

6) Put each set of pieces in a separate bag, and draw out one at a time (all players draw at the same time). Try to place the pieces in this order.

7) Spatial awareness: Make a sheet of the accepted orientations of the pieces, they MUST be placed as pictured on the sheet. See if the students can make this work, or if they must use 2 “wild” cards that allow them to re-orient any 2 pieces in the round. Talk about why this works/doesn’t work.

Alternative Uses:

1) One you have a base set, you can make reasonable copies with cardstock. (Though the heft of the real tiles is nice!) Use these sets and a class set of boards to do math warmups in small groups or as a whole class. Show a board or other shape filled by certain pieces; see if the students can recreate the shape or board to show spatial reasoning in pairs or small groups.

2) Try the above with a larger set of tiles make from cardstock, large enough to fill a board or wall with a teacher-set puzzle! (Also popular for math corner in younger grades.)

3) For younger children: make cardstock versions of the pieces and leave them out with different shape puzzles in the style of tangrams, where they try to orient the pieces to fit in the outlines.

4) PreK-Kindergarten: Use the pieces in individual sensory trays- water or shaving cream. Provide squares and rectangular shapes of different sizes, and/or a vertical surface to stick the tiles to. Talk to the kids about seeing and counting the squares in the tile, and how they fit together like a puzzle in different ways.

5) Mix the colored tiles together and have a small group of students seek out particular shapes. Since they may be in a different orientation, this is a good gauge of spatial awareness. You can even use the building cards to select each shape in the search!

6) Make a shape of 15 of the pieces- take a picture. Add the 16th piece- take another picture. As a math warmup or in a small group, ask the students to identify which piece is missing/needs to be added to the first picture to make the second picture.

These pieces are so fun- comment below with your own ideas and discoveries?

Posted in Boardgame | Tagged , , , , , , , , , , , | Leave a comment

Can’t Stop

IMG_2202

According to my designer/developer partner, this is one of the first Euro-stye games from the 70’s. We found it at a local thrift store, but it is an easy DIY.  It is a more engaging form of some math games I have seen using dice.

Components: Stop sign game board, 3 white markers, 4 dice, and 11 square markers in 4 colors (44 total)

Standard Play

Each player chooses a color and receives all of the square markers in that color. On your turn, you roll all four dice. You must make 2 groups of 2 dice from your roll; the grouping is up to you. Add the 2 dice in a group together to get two numbers. Place a white marker (up to 2 on a turn) in the next-highest open space under the matching number on the board. 

For example, if I roll 1, 2, 3, 4. I can make 5, 5 or 4,6 or 3,7.

Choosing 5,5 I would take one white marker and place it two spaces above the bottom under the number 5 on the board.

Choosing 3,7, one white marker goes in the empty space closest to the bottom under 3 and the other under 7. 

Since I have 2 (or 1) white marker left, I roll the four dice again, and repeat the process. In the best case scenario, I would be able to move a marker multiple times. However, once you place the last of the three white markers, your rolling is done. You don’t have to roll more than once, you can stop your turn any time.

Before handing the dice to the next person, replace the white markers with a square of your color and hand the white markers to the next roller.

IMG_2203

Now each player starts from the bottom of each column. This means that in a turn you may leap-frog over another player’s square. Notice that more frequent combinations have further to go to reach the top of the board. Once a player’s square reaches the top of a column and COVERS the number at the top, that column is sealed and no more action is done there. If you choose that number on a subsequent turn, you are allowed to ignore that number.

To end the game, a player must have three of their squares covering three different numbers.

Variations

1) To increase the push your luck element, you can enforce the rule that you MUST place two white markers on your final roll. So if you place one (double number result like 5, 5 or 6,6) on your first roll, you could place both on the second safely, unless you get another 5 or 6 (in this example) and then you need to decide whether to risk getting a number combo you already have or losing it all…

2) To speed up the game, give the students 6 dice so they can make 3 groups in one turn.

3) Use a timer. When it rings the students who have the highest square in each column get that column number header as “points,” add each player’s points together to decide the winner.

4) Cooperative: 4 teams of 2 can play with one team member rolling and the other choosing the combinations. They roles switch on every roll.

Classroom Use

Obviously the biggest draw for using this is in grades where adding and number combinations are important. K-3 would need a small group tutorial to start, but students older than 6 should be able to play simplified versions independently. If you have 6+ sided dice (I had 10 which I had to train them to read) you could make your own version of the board to use. I would suggest not using more than 10 number columns, pick the most common combinations.

If you have a Smart board, document camera, or overhead, this is a fun game to play cooperatively as a math warm up. I used name sticks to pick a “player” to roll and move, but made them talk through their process. The entire class would play against me (so a two player version) and I would likewise talk through my process for adding and choosing.

DIY

Dice and markers should be easy to find, I would love to see any thematic versions of this game that you make. It is out of print, but there are various versions that have been published over the last 4 years that you may be able to find. If you make your own, you may want to mark the columns with raised dots/sticker on the cardboard board.

Posted in Boardgame | Tagged , , , , , , , , , | Leave a comment

Timeline

Timeline is a quick logic card game that relies on the players knowledge of events and ability to reason. There are a few different versions available for $10-$15 each: Inventions, Science & Discoveries, Diversity, and Historical Events. If using this in a conservative area, you may want to double-check that none of the included cards would be considered controversial for your classroom. If you want to use the game mechanic with students younger than 10, I would suggest making your own thematic set or using a subset of the provided cards.

 IMG_1988

Components: 110 cards in a cute tin

Setup: Shuffle the 110 cards, ensuring all show the event only side and NOT the date. Deal each player 4 cards event only side up, leaving them on the table. Make sure no one sees the dates! Place one card from the draw pile DATE side up in the center of the playing area. This is the foundation card around which the other cards are placed.

IMG_1990

Standard Play

On their turn, each player selects a card from their hand and slides it to the left (before) or right (after) of the foundation card in the playing area. The player can announce that their event happened before/after the foundation card’s date, and then flips over their card to

show the date for confirmation. If the player placed their card correctly, it remains in the timeline. If they were wrong, the card is discarded and a new card is carefully dealt to that player. The goal is to be the first player to get rid of their hand.  As cards are added to the timeline, guessing becomes more difficult as cards may be placed between cards, some with very close dates! For example, imagine having to decide when the discovery of Komodo dragons by Europeans occurred around the abolition of slavery in the USA and the theory of evolution!


IMG_1989

Posted in Boardgame | Tagged , , , , , , , , | Leave a comment

PitchCar

Hands down, this is the most popular game in my classroom- for boys and girls.  I have had to use a lottery system to make sure everyone gets a turn at choice time! The track is scratched and the car-discs are worn since this is my most heavily used game. This game is also expensive (heavy and coming from Germany, retails around $60), but very much worth the investment. There are various expansions with jumps and the like, and a “mini” version ($60 as well, but better if you plan on using multiple sets at once for science or math extensions or are space limited).  If you know someone who is good with a skill saw or cardboard and duct-tape, DIY versions are possible. My students did make take home versions with cardboard, but the tracks were static.

IMG_1986

Components: 8 wooden discs with car stickers, 16 red removable safety barriers, 6 straight track sections-1 with a start line sticker, 10 curved track sections.

Setup: The rule book includes pictures of various track configurations. I set the track to something easy (fewer curves) the first time, and put red bumpers at all curves. Later I let a student chosen by lottery select the track.  The track is best set up on the floor or a table that can be moved around easily by the players. Each student selects a car color, and some method is chosen to decide turn order. I have the students hold their cars until their first turn.

Standard Play

On their first turn, the student places their car behind the solid start line and “flicks” the car with any finger. If the car ends on the track, it remains there until that players next turn. If the car ends off the track, it is returned to where it started on that turn and play is passed to the next player. If another player’s car is knocked off the track, it is returned to its spot. The first player to lap the track 3 times is the winner.

Variations

Removing bumpers, adding turns, and making the track longer will increase difficulty as needed.

1) Students play in teams, and take alternate turns flicking their car. 4 teams of 2 instead of 8 single players allows students to work on social skills, and keeps the track less congested.

2) Students are allowed to knock other player’s car off the track. A car that is knocked off is placed at the starting point of the car that knocked it off (approximately). 

3) Younger students: Shorter tracks, more bumpers, and allow the students to one-finger push the car if flicking is too hard.

4) If time is an issue, set a timer and have the “winner” be the student or team that makes it the farthest around the track.

5) For a faster game:  introduce the rule that cars that go off-track must return to the starting line, but only one completed lap is necessary to win.

Alternative Uses

1) For ages 3-5, I have placed the components out and let them play with the pieces. I do show them how to “flick” to build their handwriting muscles, and teach them to “lap” the track. Once the basic skills are present I teach them basic game rules, unless they request game rules first!

2) Physics: When talking about force, friction, trajectory, momentum, lows of motions, etc. this is a great way to introduce, demonstrate, practice, and discuss these concepts. The students can be challenged to build “flicking” mechanisms, better cars, or design faster tracks.  The students loved building their own take-home versions from cardboard and other reused materials. I would not let my students add lubricants to my track, but many did on their own tracks.

3) Math: Building on the physics, older students can practice measuring, practicing formulas, and devising problems based on the racetrack and car mechanics. 

Posted in Boardgame | Tagged , , , , , , , , | Leave a comment